Dies ist eine alte Version des Dokuments!
TP Link Archer C6/ AC1200
Connect the blue Port on your Router with the included cable to the RJ45 (Ethernet) plug in your wall.
You can now connect to the WiFi being transmitted by the Router and access the configuration interface in a browser (i.e. Google Chrome). The name of the WiFi you have to connect to will be written on the bottom side of the Router. To do this you enter „192.168.0.1“ into the address bar.
You will now be prompted to change the password needed to access the configuration interface. Please enter at least an 8 character long password that your are not using anywhere else.
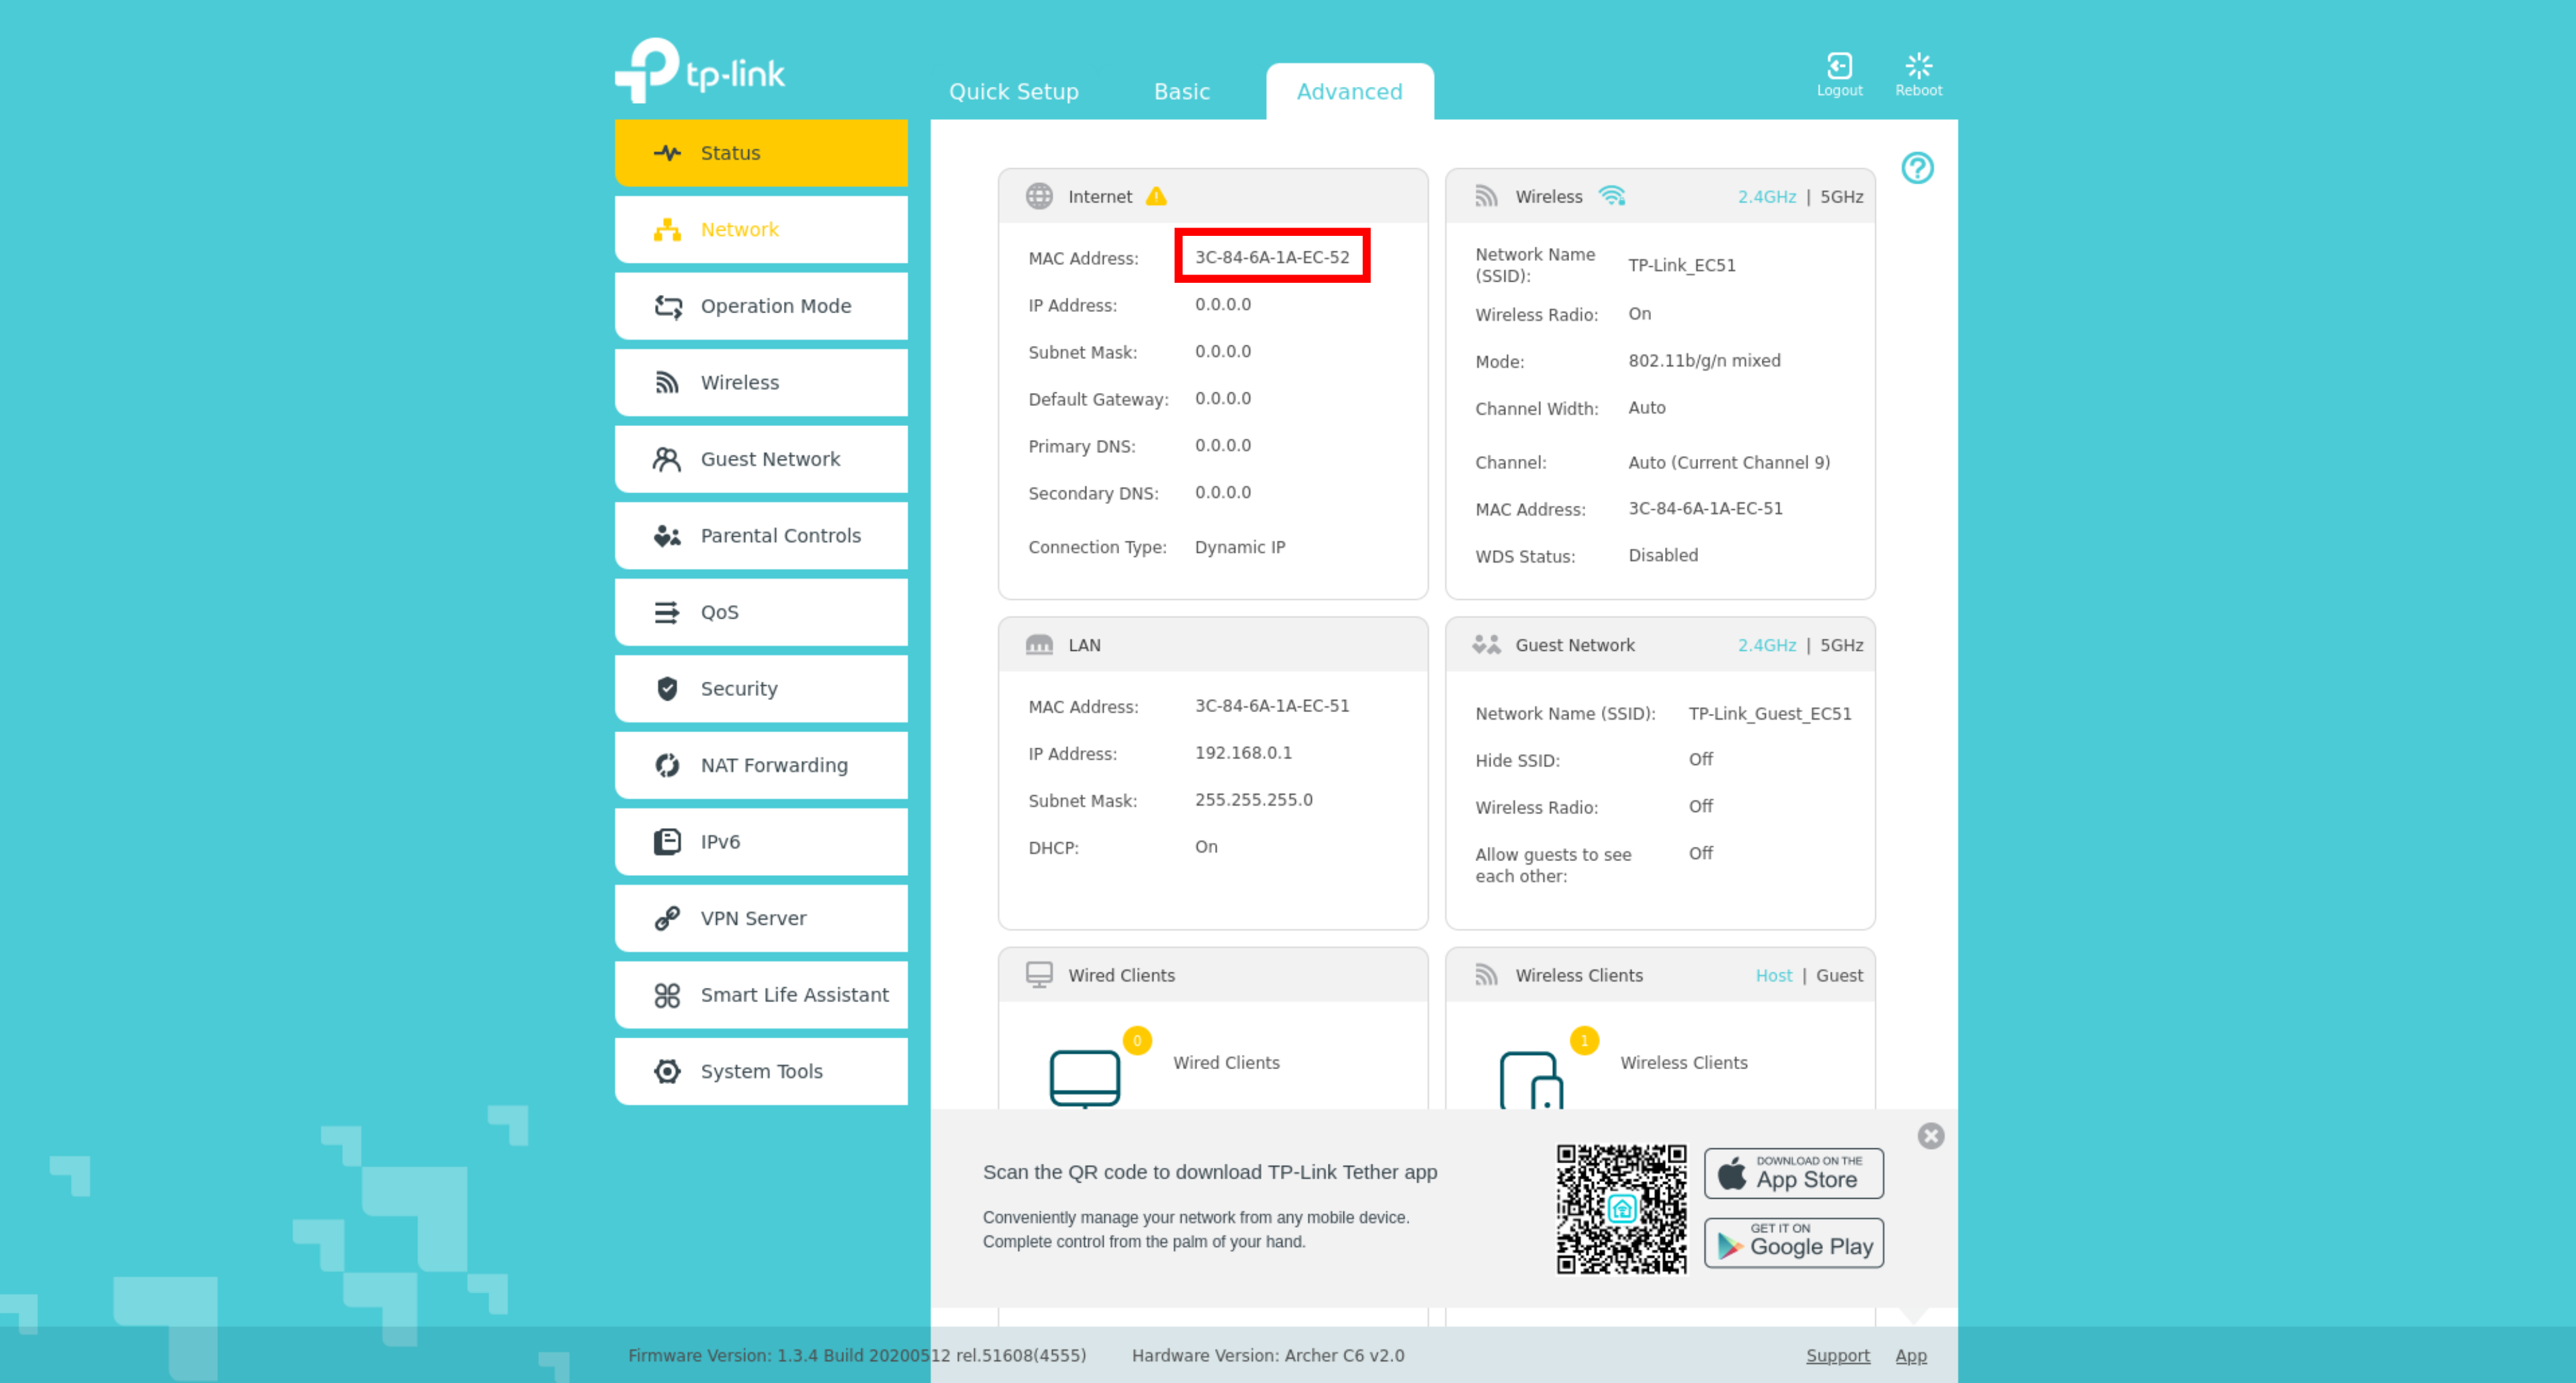
Please skip the „Quick Setup“ and navigate to the settings for advanced users. Register the MAC Address you find there on our website under „My CSN“/ „My devices“ (https://www.csn.tu-chemnitz.de/secure/user)
After the registration of the MAC Address please wait for 20 minutes until the changes are applied to your port. After this, you can complete the „Quick Setup“ of your Router.
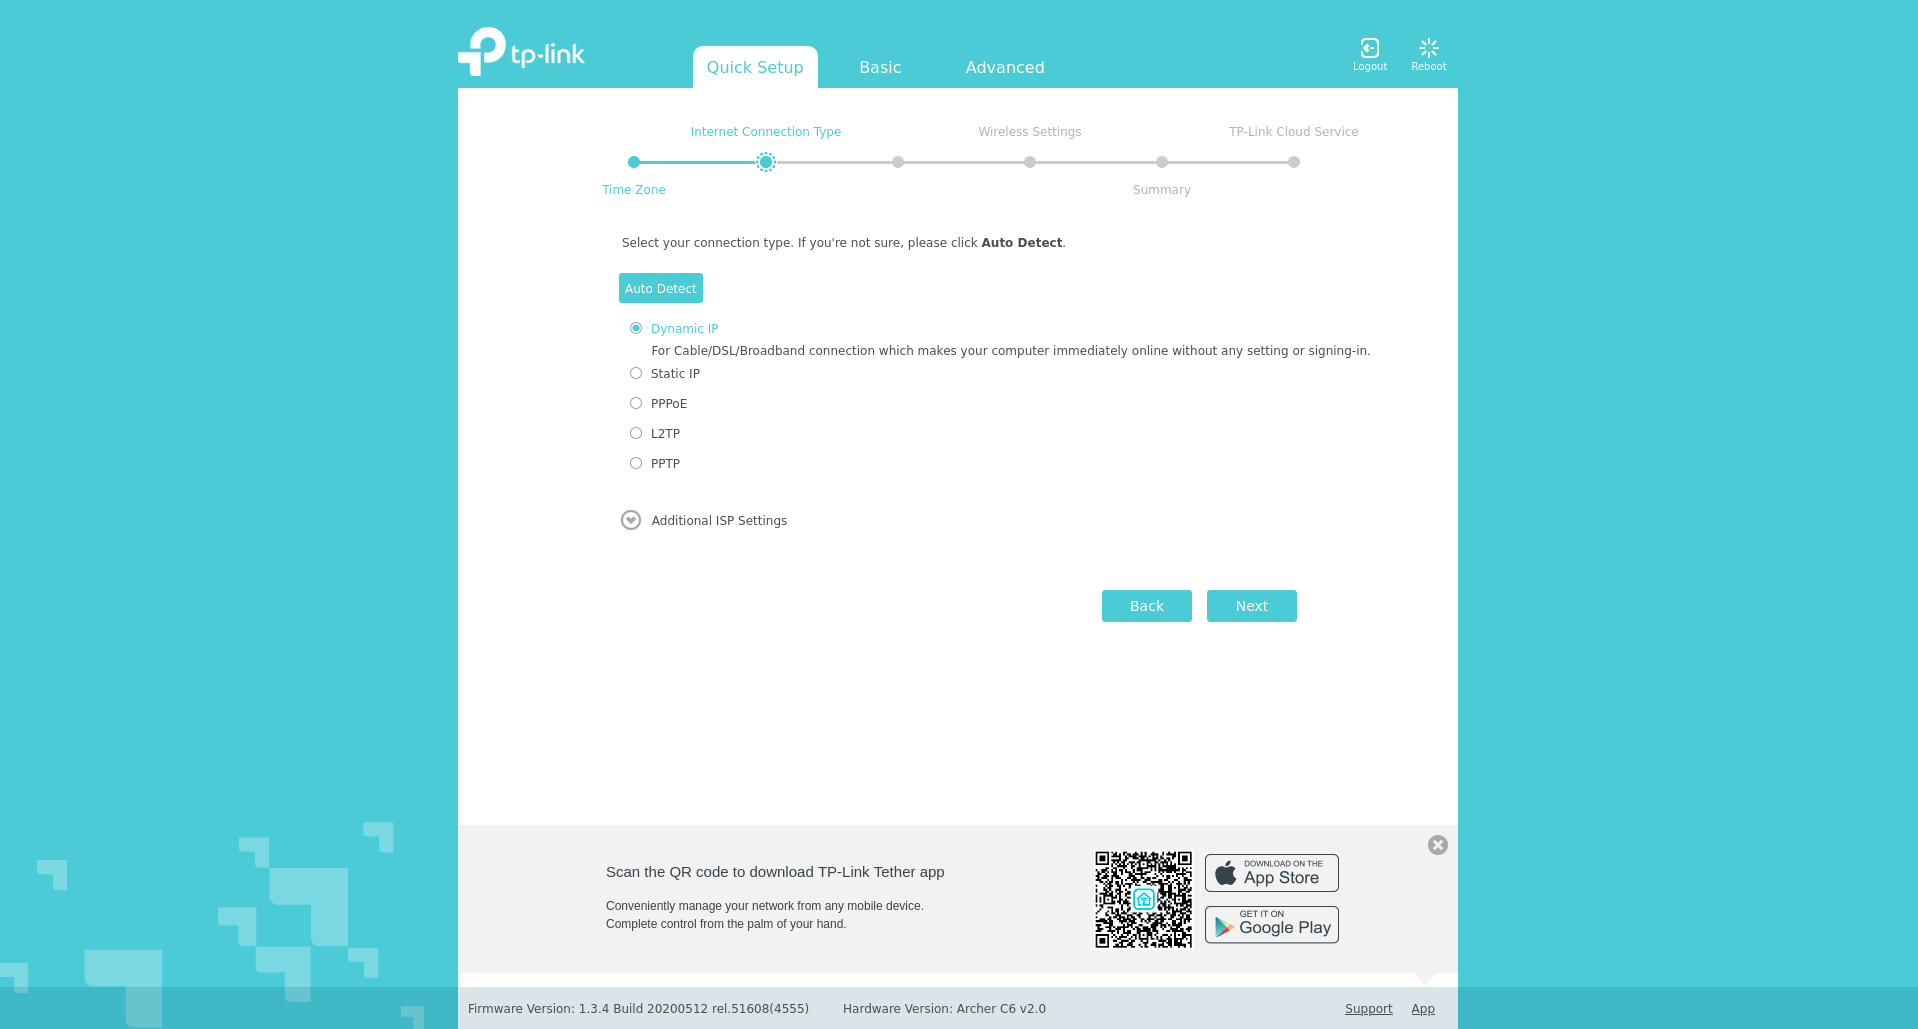
In the next step please choose the connection type „Dynamic IP“.
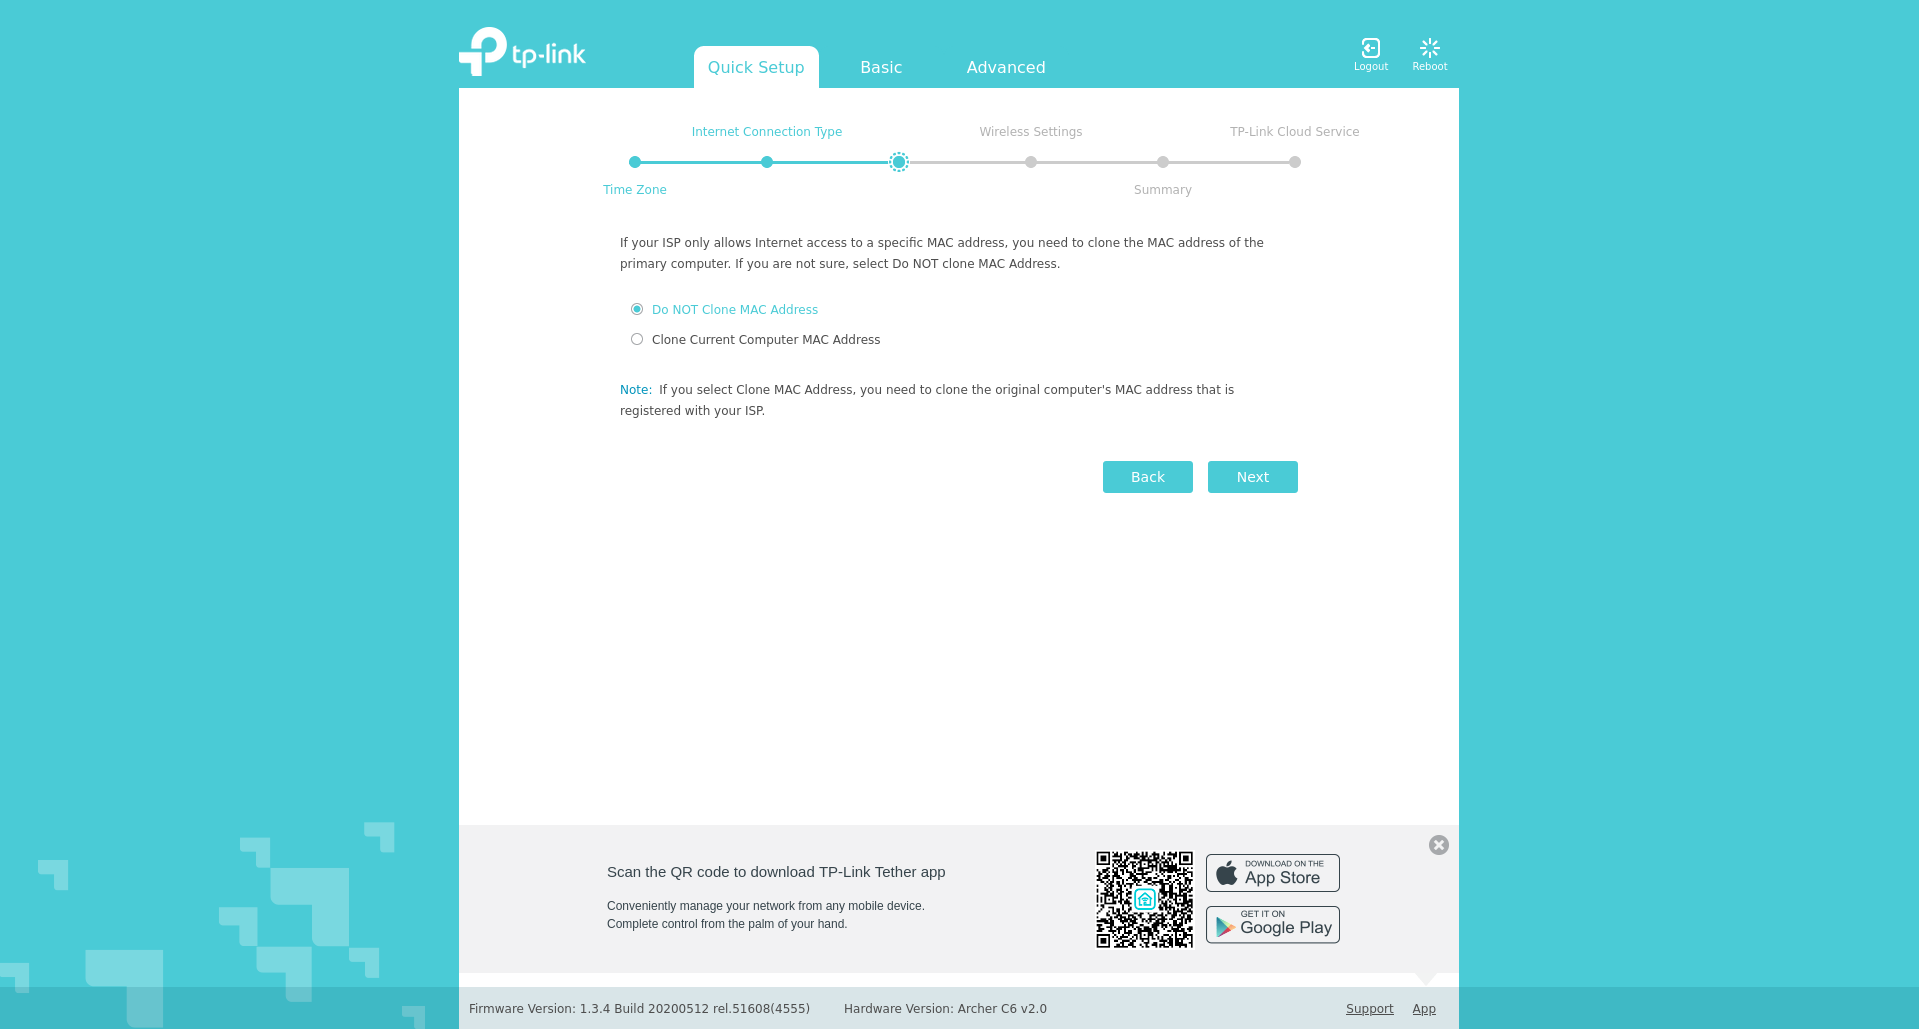
Now ensure that the settings are not configured to clone the MAC Address of the connected device.
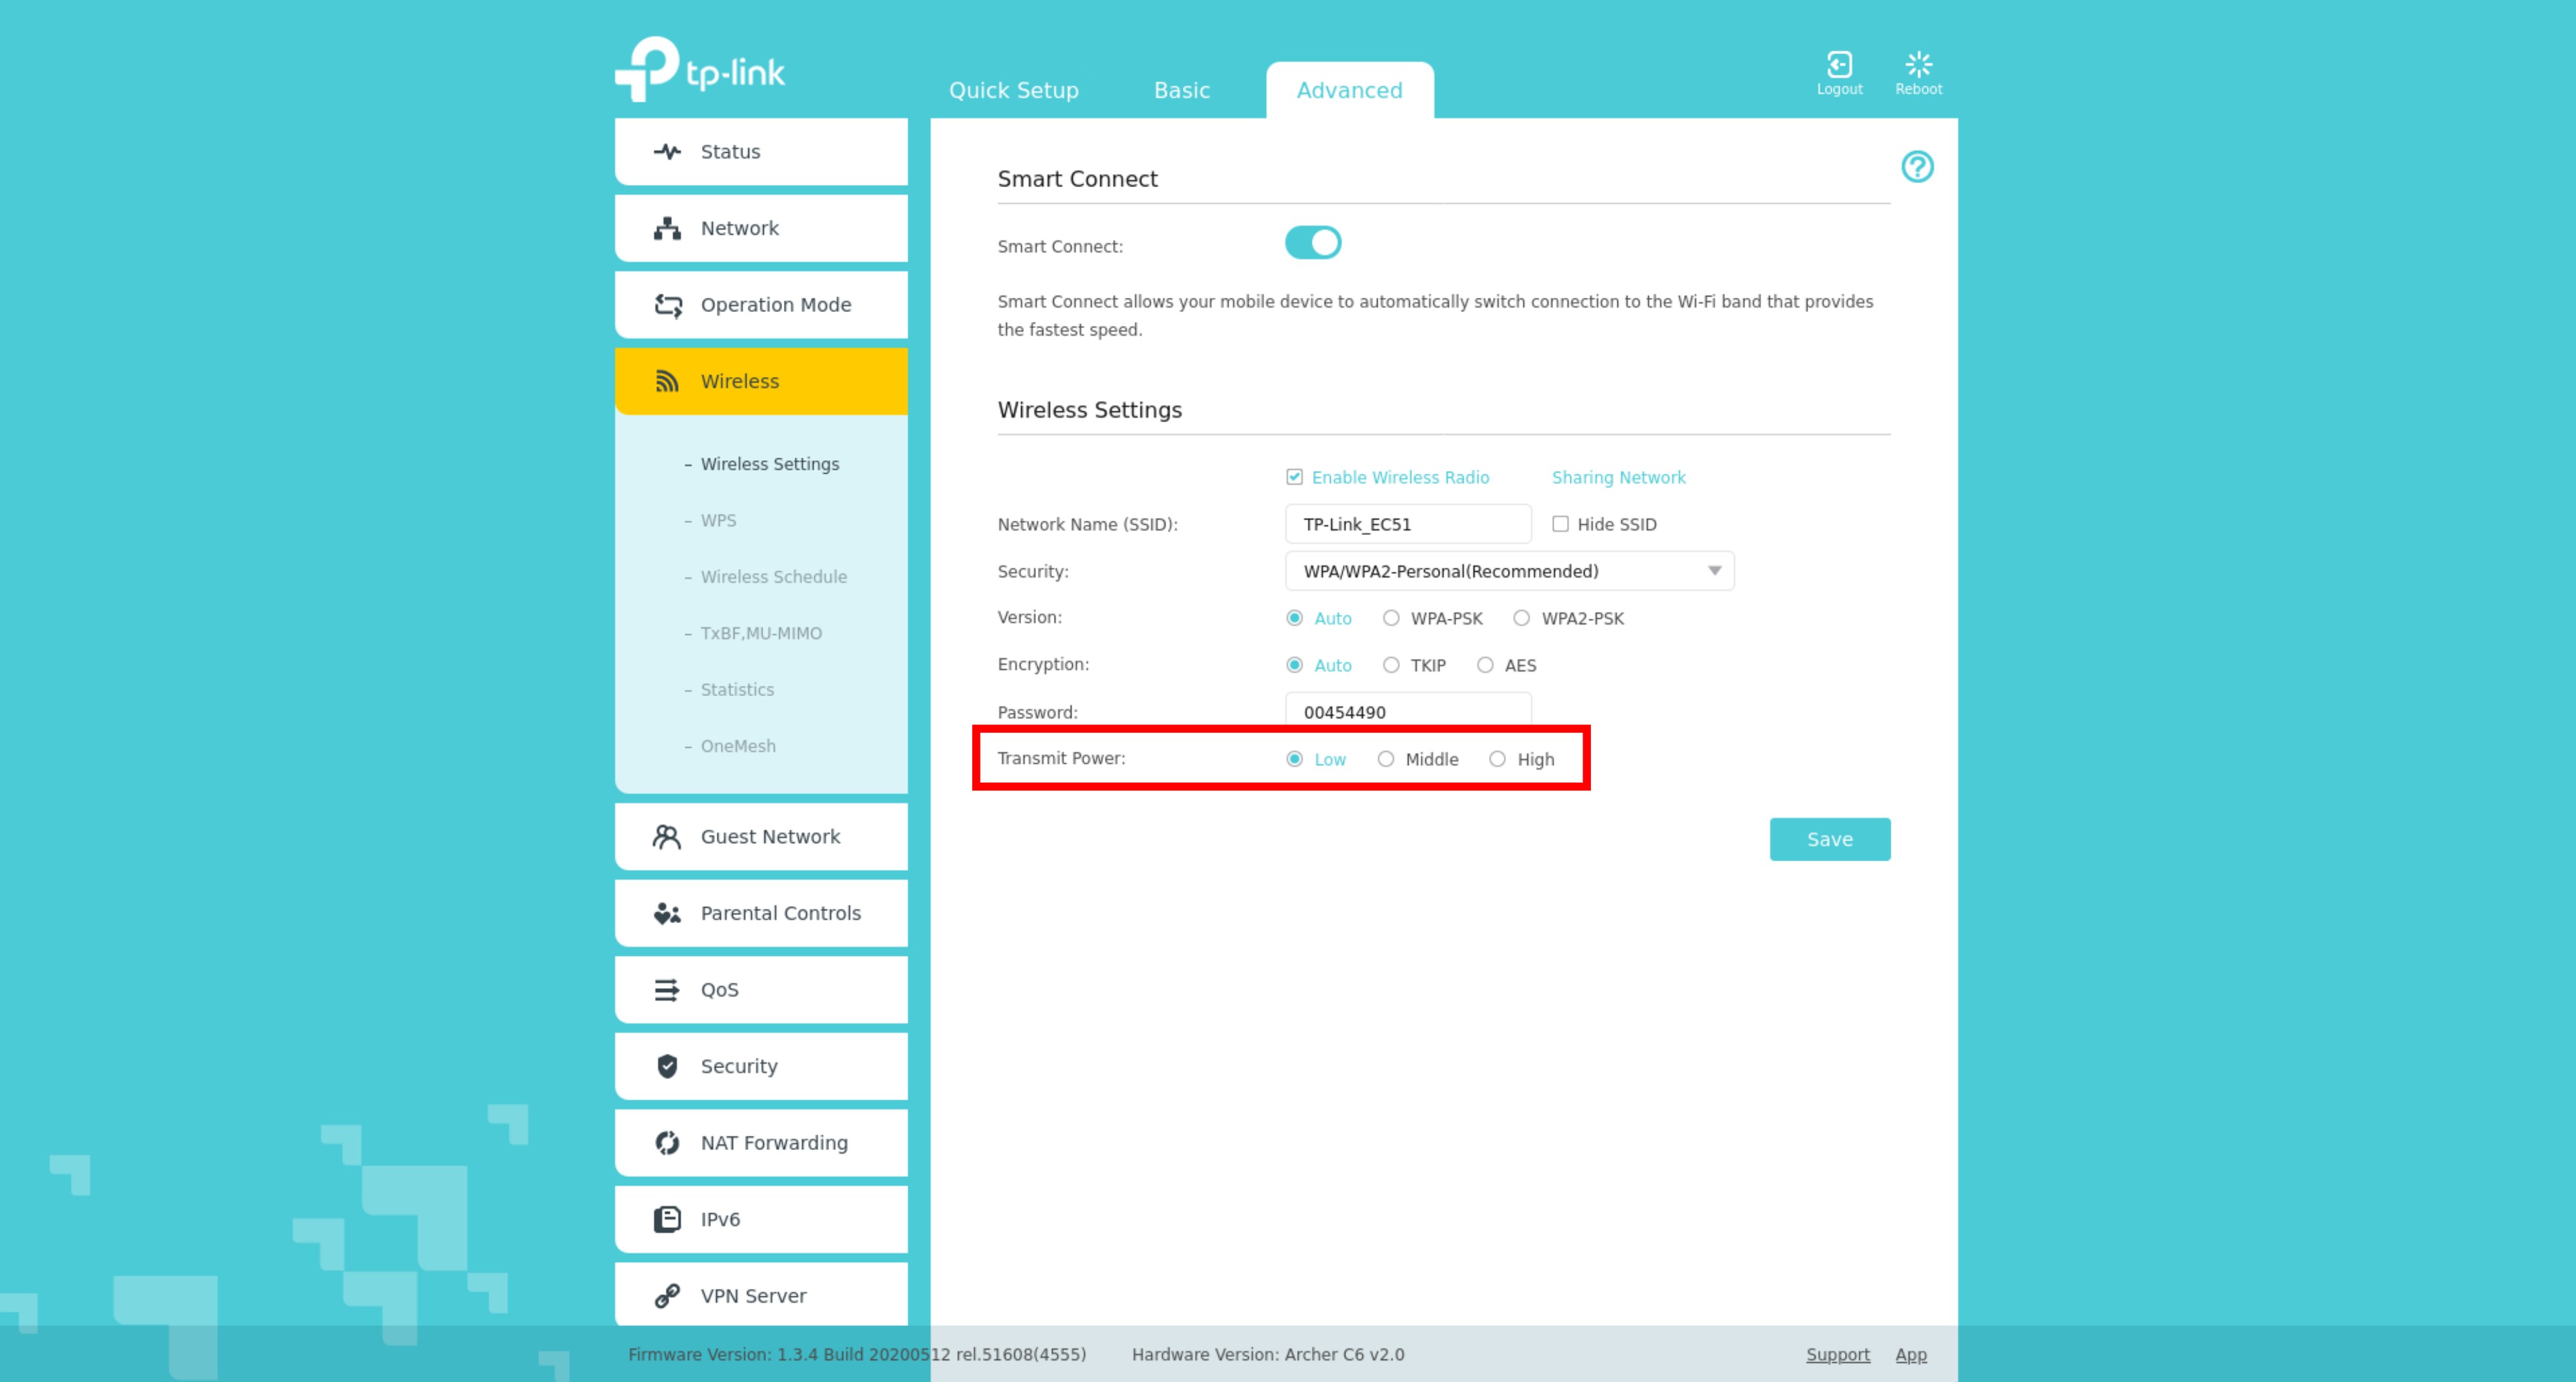
Nachdem du das Quick Setup abgeschlossen hast, solltest du noch eine weitere Einstellung ändern: Die Leistung, mit der der WLAN Router sendet. Für die meisten Wohnheimzimmer sollte die geringste Leistung ausreichen. Wenn du und alle umliegenden Mitbewohner diese Einstellung so ändern, wird die Verbindungsqualität im WLAN für alle besser! Die Einstellung wird im Bereich „Advanced ⇒ Wireless“ vorgenommen.


