Fritz!Box 4040
Connect the blue port on your router with the included cable to the RJ45 (Ethernet) plug in your wall.
You can now connect to the WiFi that is being transmitted by the Router. To do so enter „192.168.128.1“ into you browser (i.e. Google Chrome).
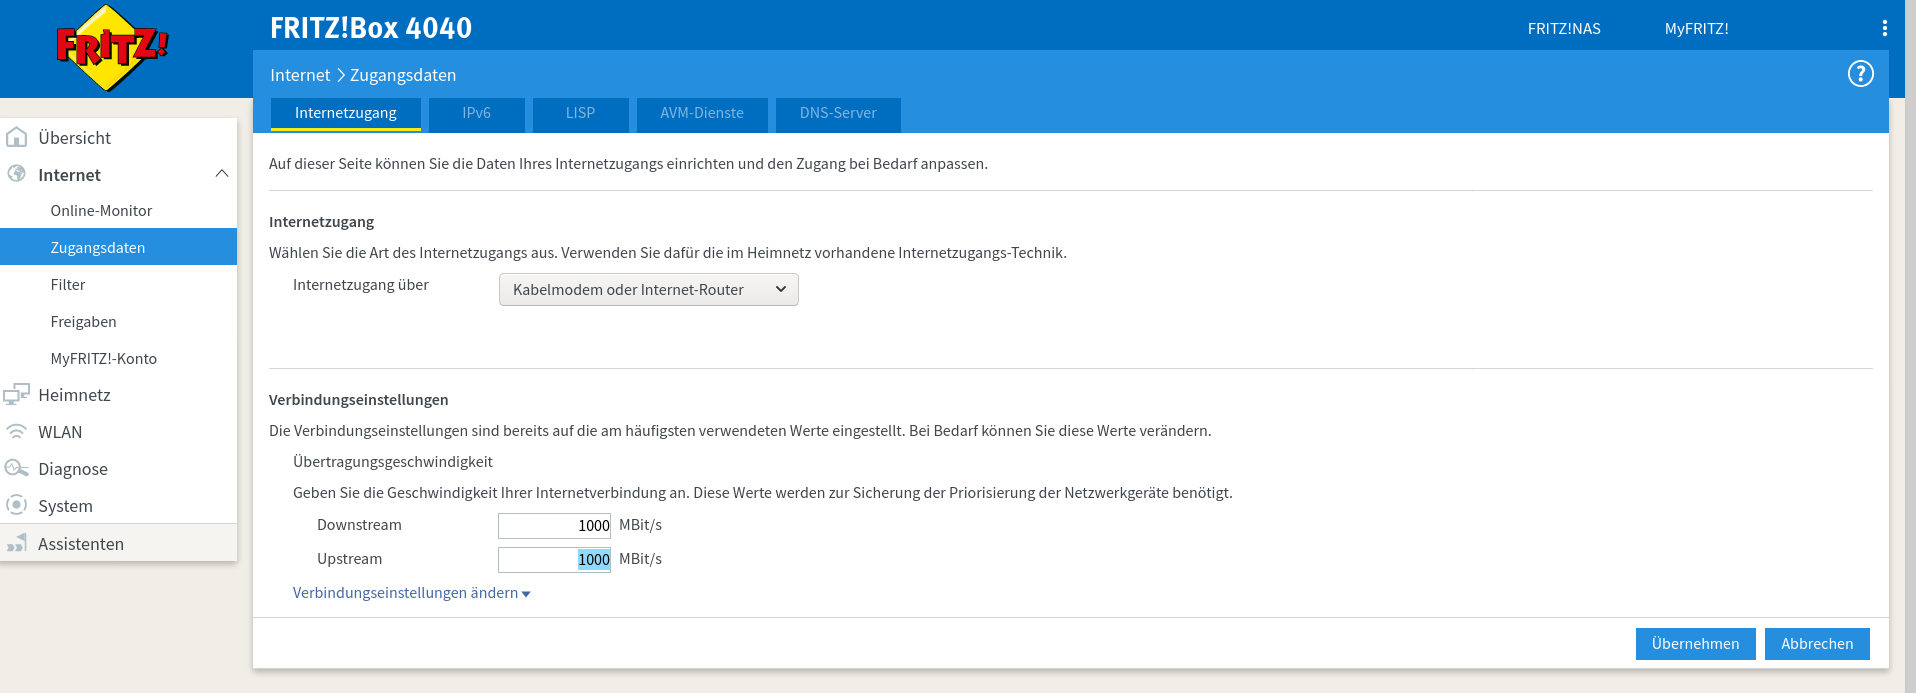
First of all change the available bandwidth to make sure Quality of Service is working correctly.
The router can subsequently be registered via the Captive Portal.
The automatically detected MAC-address has already been filled in. Don't change it! If the router has been wired up correctly, that's exactly the MAC address that needs to be registered.
Appartements contain up to 4 ethernet wall sockets, for some appartements there's only one available. Usually these sockets have been labeled. Choose the socket you've connected the router to under the „socket“ option accordingly.
Under the device type you can select the type of device you're registering. (Router, Laptop) This setting does not have any meaningful effect. It's only of decorational use.
After pressing „Apply changes“ the access will be set up. This may take up to half an hour until completed.

